Deux Chevaux et Charrette Ltd.
2CV Repair & Restoration Specialists
2CV Tips
Common Problems
Here are some common problems accociated with 2CVs. Note: These are my personal observations and comments. If you are interested in having restoration work carried out on your 2CV, please complete our contact form.Engine Problems
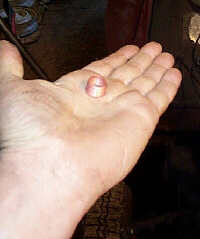
Damaged Pistons
These three pictures are of pistons from engines which have lost compression on one side (usually left side). There are may schools of thought as to the pro's and con's of using unleaded fuel with an additive or the new British fuel LRP (Lead Replacement Petrol). Until LRP is given a BS(British Standard) number, most advice is to tread carefully experimenting and talk to other drivers of same cars.My advice is to avoid long distance constant speed running (i.e. motorways) and keep to the A roads. Make sure that your tappet adjustment is checked and adjusted each year, together with a small tightening of the cylinder head
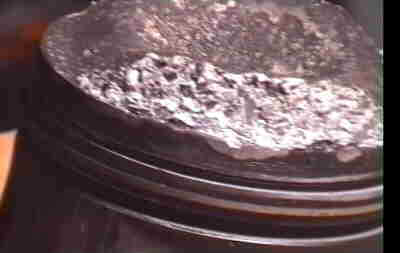
The crown of this piston was impacted by the broken parts of piston rings being trapped in the cylinder head when the piston reached "top dead centre"
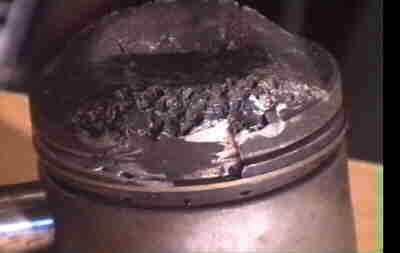
You can see from this picture that the top ring has broken away from the piston and caused damage to the top 10mm of the side.
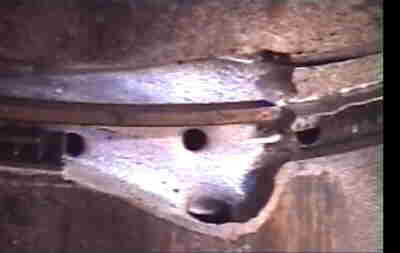
I don't know how hot aluminium has to get before it melts, but this piston had a melted segment around the centre piston ring.
Wrecked Engine!
I have only ever seen this problem twice. The first time the car was still driveable, but only on one piston. But in the case of this engine, it was only being driven back from the railway station by the au pair, a distance of 3km.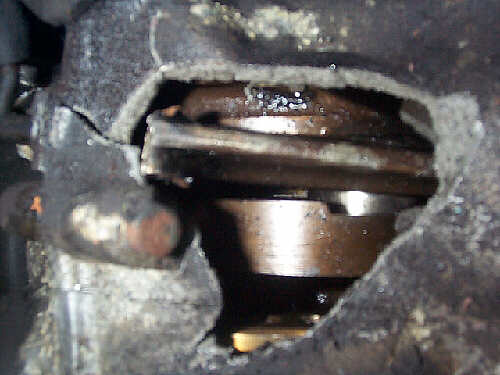
To everybodies amazement the connecting rod broke and wedged itself over the crankshaft pushing a hole in the top of the engine.
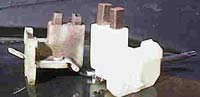
Spark Plug Thread Repair
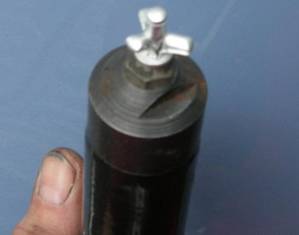
This ingenuous repair collar made by the Wurth Company has made repairing spark plugs a simple operation without removing the cylinder head.

This is the final operation of inserting the insert into a previously tapped thread in the cylinder head allowing the insert to be driven home and the inner part of the thread is forced outwards by the tool in the photograph thus allowing the insert to be a permenant fixture.
Alternator Problems
Charging Problems
Iskra Alternator Bushes.When alternators stop charging it often and usually just the bushes for the first and second time. Later it can be more serious.
These bushes show how the wear takes place on the Iskra type alternator.
Note the shoulder (right hand brush of the left hand set) that has developed, lifting the bearing surface of that brush from the slipring.
By breaking off this carbon shoulder the brush will come in contact with the slipring and allow the alternator to charge again.
Electrical Problems
1950's Slough 2CV Wiring Diagram
Diagram showing:1950's Slough 2CV Wiring Diagram
Chassis Problems
Chassis Rot

This is the underside of a 1981 chassis photographed in Oct 1998. It shows how good the underside of a chassis can be.
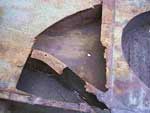
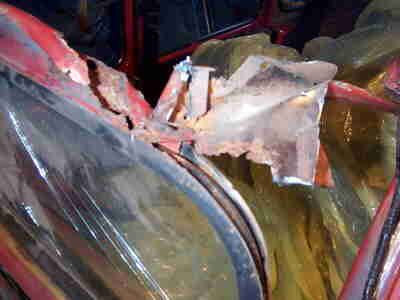
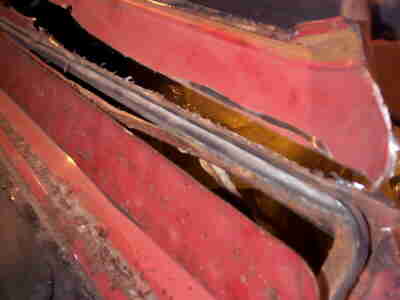
The top however can tell a different story!
This rot was caused by a leaking windscreen rubber or vent flap and allowed water to sit on the floor and top of chassis. This chassis is repairable with some new internal structure and outer P.O. plates.
(If you have water in this area mop it up NOW with a few sunday newspapers - change this every week WITHOUT FAIL.)
Chassis Weakness

Classic signs of front chassis drop. It can go the other way when the chassis comes up at the front and there is a bulge in the triangular panel.
When you are at this point, or a little before this, you will find that opening the bonnet becomes difficult.
Body Problems
2CV Bonnet Hinge Repairs

The problem occurs when not enough attention is played to the area behind the bonnet as soon as it occurs. Rain water enters under the factory mastic and penetrates very deep and fast.
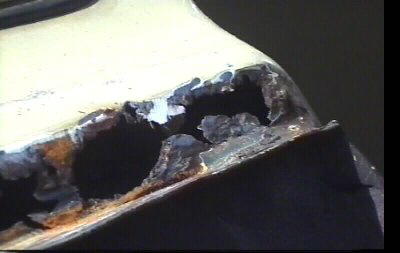
A close-up of the holed area shows the depth of the problem (like this all the way across). This is a 1989 car and had this amount of rust in March 1999 after careful looking after and at least one repainting and resealing.
Before I knew the full extent of the holed rust. I thought I would just use this minor 1st hinge. But when the factory hinge was removed the full extent was obvious (see next pic).
The last pic shows the full panel which was let-in. It goes completely up and under the vent flap.
Bonnet Hinge Preventative Measures
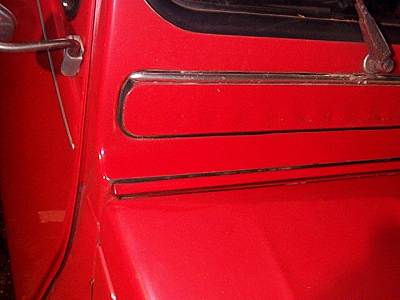
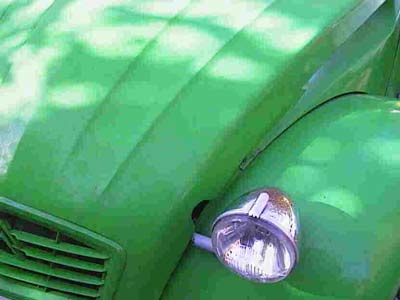
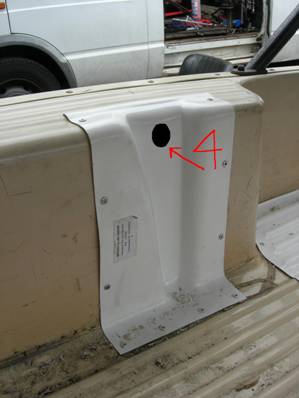
This 1983 2CV photographed in 1999 shows a fortunate owner who does not have any problem with bonnet hinge deterioration.
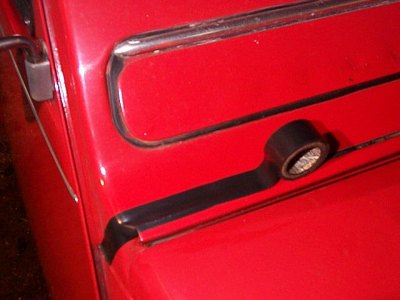
To avoid the catastrophic situation seen in "bonnet hinge repairs," a simple winter measure is to place electrical tape across the mastic area.
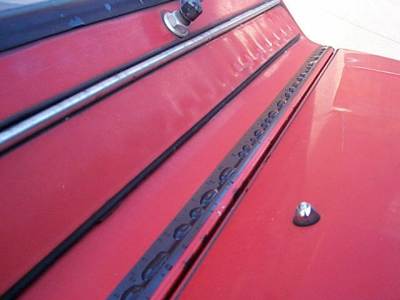
You can see here how effective the tape is in not allowing the water down between the mastic and the metal.
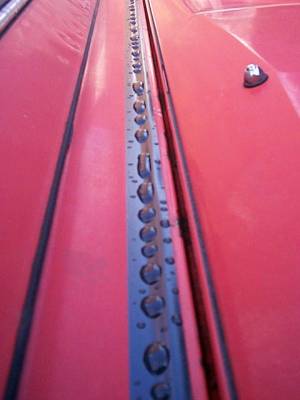
If your 2CV should be parked in the street, this tape acts as a rain gutter dispelling the water to one side of the vehicle.
2CV Windscreen Surround Panel Replacement
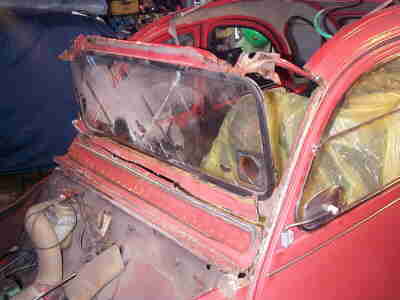
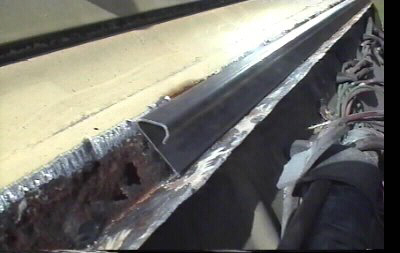
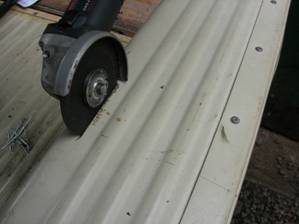
Surgically with a mini grinder make the necessary cuts to remove the windscreen surround with the least number of insertions as possible (observe the new piece before you start working).

Be very careful when using the grinder not to cut the wiring loom and the grey felt trim on the inside above the doors.
Note:
On right hand drive Dolly, Club and Charleston models there is a single wire running up the drivers windscreen pillar for the interior lamp.
Note:
On right hand drive Dolly, Club and Charleston models there is a single wire running up the drivers windscreen pillar for the interior lamp.
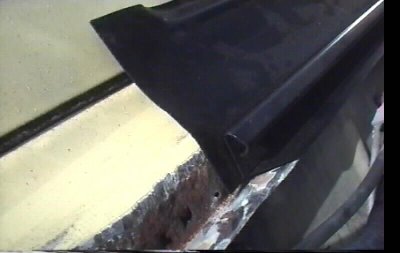
Be prepared for the windscreen to break and the rubber seal to be perished. It's good practice to replace these items with new components from the outset.
Also be prepared to replace the vent flap however good yours looks. Make sure that while it is off, you spray in the rear box section, while it is upside down so that a preservative such as Wurth 2000 can penetrate the upper spot welds and then spray it again when the job is finished and again every year thereafter.

After you have removed the rusty area, any captive 5mm threaded nuts which are welded to the inside of this box section, and have had their heads sheared when removal of the windscreen wiper motor and flap control, can now be replaced by welding new nuts to this panel.
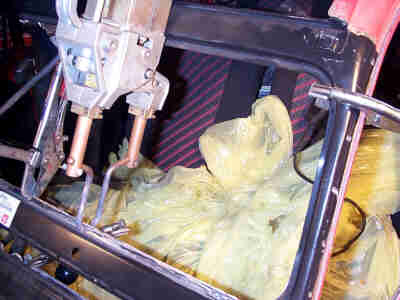
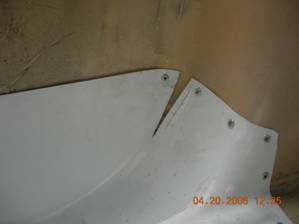
Once the main part is placed into position, spot welding can take place on the obvious faces...

... and the side pillars can be puddle welded in the pre drilled holes up the side making sure that the wiring loom is well out of the way.

Before going to the paintyard, inspection by the future custodian of this 2CV gets approval
2CV Windscreen Surround Panel Replacement

When the rear panel has been cut from the 2CV , be prepared to remake some of the lower rear floor. If the area where the spare wheel sits is holed be prepared again to maybe replace the whole boot floor.
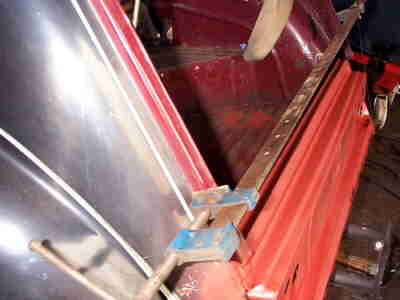
When working and refitting the rear panel of the 2CV make sure that the edges of the boot orifice do not widen as the boot lid will fail to close. I use a woodworking sash clamp to hold the sides parallel. It is a good idea to measure across the boot gap before starting work.
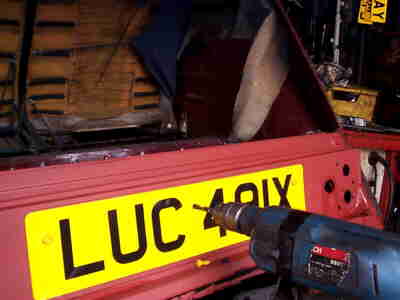
Lastly a tip on fitting number plates. In GB our plastic number plates expand and contract with the seasons and I always use three retaining bolts with oversize holes to allow the number plate to move with temperature.
Finally you will notice that my fixings are above the centre line. This is because when you hand on the inside you will find that you are restricted in the method of fixing.
Finally you will notice that my fixings are above the centre line. This is because when you hand on the inside you will find that you are restricted in the method of fixing.
Seat Problems
2CV Seat Repairs
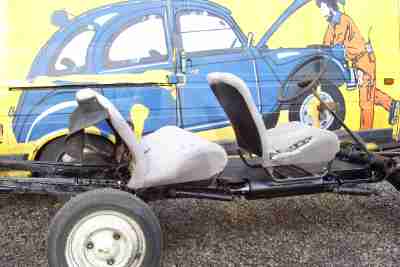
Many cars by now are suffering from biodegrading seats

On right-hand drive cars the outer drivers seat often wears out on the outer edge.
All cars suffer from sunlight through the back window.

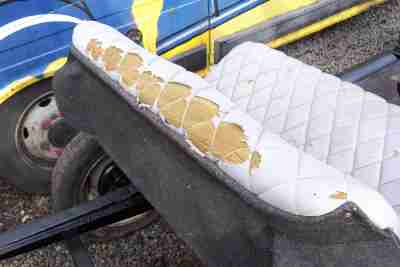
Many suffer from old age or overweight middle-age drivers causing the central canvas to split and tear together with a few rubber bands breaking.
I always fit a new canvas piece and some rubber bands.
I always fit a new canvas piece and some rubber bands.

More warn out seats require one or two layers of foam before being covered.
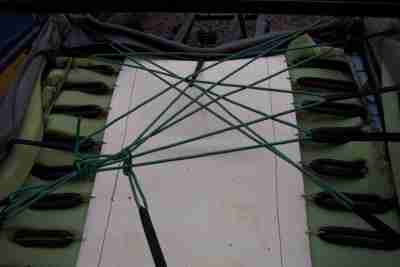
I find that the front seats will benefit from the tying tags being drawn together using electrical wire as the supplied canvas tape often breaks after a while.

The new seat covers are of higher quality than the original factory type and as yet do not biodegrade.
Mehari Seat Conversion
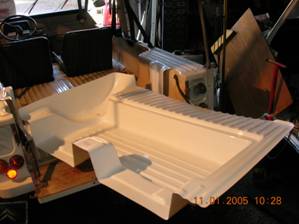
This is the main foot well part which is supplied with every part and rivet required to complete the task of converting a 2 seater Mehari to a 4 seater model.
The foot well fits like a glove, but must make sure that your model has 'the hump' between the 2 front seats so that the new part will truncate onto it.I am sure very early 2 seaters do no have this 'hump.'
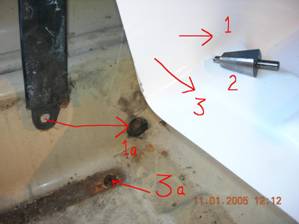
You can't quite see this, but '1' & '3' have moulding pilots so that you can drill the seat belt and seat runner holes '1a' & '3a' with a good taper drill ('2').
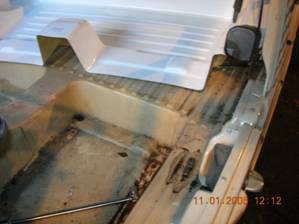
After carefully fitting the new part in the car you can draw round it to make the cut line.

Making sure you cut on the correct side of the line you can expose the metal space frame below. Make sure you use a mask and goggles when cutting the ABS plastic. Pay particular attention to the wiring loom, the space frame and the front seat mounting frame, all are close to the grinder wheel as to passes around the Mehari.
These are special plastic pop-rivets; they tend to give a larger bite surface on the hidden side, and are all supplied to do the job. There is the correct number in the kit. No room for error.

The old support for the floor just lifts and hooks out. The new floor can be placed into position and the front seat belt lower bolts fitted together with heavily greased rear seat runner bolts of the front seats.

Working from the front to the rear, drilling and pop-riveting in the rivets seemed to be the best way to go.
The only place where the new part was not quite right was under the spare wheel and I had to make a small grinder slit which was filled later.

This part of the operation is more daunting than the floor section. Mainly because it has to be done twice, once left and then right. It really is handy to have another 2+2 seater Mehari around when putting in these rear parts gussets so that measuring can be more accurate. Be extra extra extra careful here of wiring looms and space frame.
The only adverse criticism I have of this kit is the silly rubber blocks which are supplied to go at '4' (so that the back of the seat can be placed vertical for storage behind the seat back or sloping for a more reclined position for the rear passengers) are so pathetic as to be useless. See an original Citroen model of a 2+2 Mehari.

Using an air operated mastic gun for smooth even application a black beeding is placed completely around the outside of the new floor.
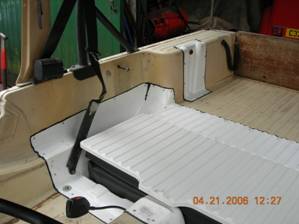
This shows the rear seat in the 'down' position for use as a load bearing Mehari...

...and in the 'up' position for people carrying.
(You can just see the grinder slit which has now received some black mastic, and will be hidden by the spare wheel.)
(You can just see the grinder slit which has now received some black mastic, and will be hidden by the spare wheel.)

Another product is the extra floor. I have had this in my own Mehari since driving to Moscow in 1990. It seems to be more durable than the original ABS one.
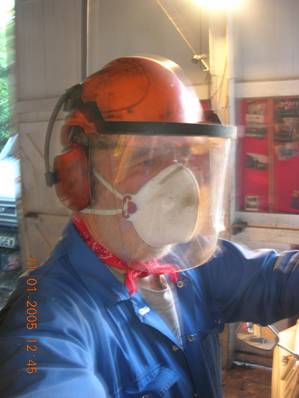
Protection gear used before cutting out the ABS plastic work.